Have you ever found yourself wondering how to make your workflow smoother and more efficient? One powerful method is to implement conditional logic in your workflow management tools. By using conditional statements, you can automate decision-making processes, which can save you and your team a significant amount of time and effort.
In this guide, we’ll walk through the steps to effectively implement conditional logic in your workflows. Whether you’re new to the concept or just looking to refine your existing processes, you’ll find plenty of practical tips and insights. So, let’s dive in and explore how you can enhance your workflows with the magic of conditional logic!
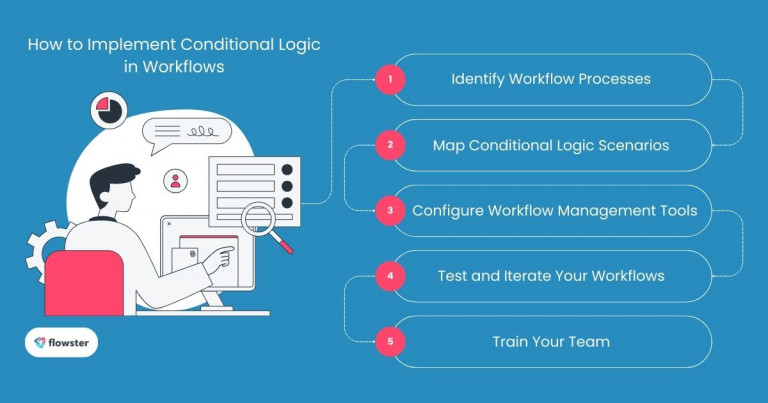
Article Outline
Step 1: Identifying Workflow Processes for Conditional Logic
Knowing where to start is the first step in optimizing your workflow. Identifying the right processes for conditional logic is crucial to ensure you’re automating aspects that will truly benefit your team. In this section, we’ll explore how to determine which processes can leverage conditional statements and provide examples to spark your imagination.
Determining Beneficial Processes
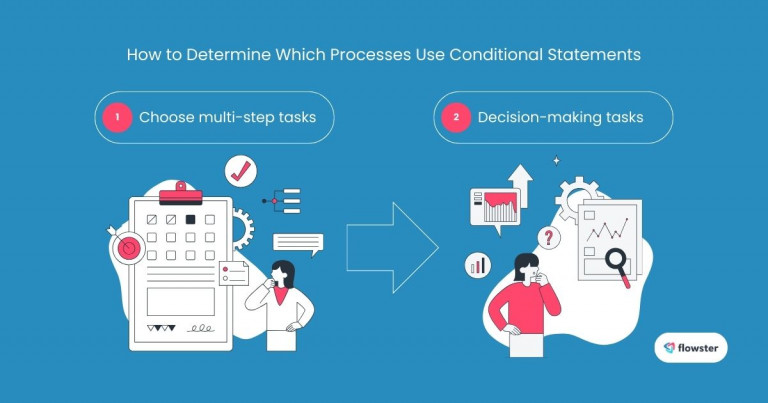
To effectively implement conditional logic, begin by analyzing your current workflows. Look for tasks that involve multiple steps or require decision-making based on specific criteria. These are often the processes that can be enhanced through automation.
Ask yourself questions like:
- Are there repetitive tasks that require manual input?
- Are there stages in a process where different paths are taken based on certain conditions?
By pinpointing these areas, you’ll be able to streamline operations and reduce errors.
Examples of Scenarios for Automation
Next, let’s take a closer look at some scenarios that are ideal for conditional logic. Consider processes like lead qualification where potential customers can be sorted based on their responses. Or think about customer onboarding, where different paths could be taken depending on user inputs.
Here are a few more examples:
- Support Ticket Management: Automatically route tickets based on issue type or urgency.
- Sales Follow-ups: Tailor follow-up actions based on customer interactions or purchase history.
These scenarios are merely the beginning. By identifying such processes, you set the stage for effective automation that can enhance your team’s productivity.
For further insights on conditional logic in workflow management, be sure to check out this informative article: Conditional Logic in Workflow Management.

Step 2: Mapping Out Conditional Logic Scenarios
Now that you’ve identified the processes that would benefit from automation, it’s time to map out your conditional logic scenarios. This step is vital for visualizing how decisions will flow through your workflows. By creating clear diagrams and defining criteria, you’ll be better prepared to implement conditional logic effectively. Let’s break this down into manageable parts.
Visualizing Decision Points
Creating flowcharts or diagrams helps you visualize the various decision points in your workflow. This visual representation is invaluable because it allows everyone on your team to understand how different conditions will affect the process.
To get started, use simple tools like Lucidchart or Miro. Begin by outlining the main steps in your workflow, then indicate where conditional statements will be applied. This visual aid makes it easier to spot potential bottlenecks and inefficiencies that could arise.
Defining Clear Criteria
Once you have your flowchart, it’s essential to define the criteria for each conditional statement. Clear criteria ensure that the logic behind your decisions is straightforward and minimizes errors in automation.
Consider questions like:
- What specific conditions will trigger each action?
- How will you prioritize different pathways?
For example, if you’re implementing conditional logic for lead qualification, your criteria might include factors like lead source, engagement level, or demographic information. This clarity will help you streamline your automation process, making it more effective and user-friendly.
By taking these steps to map out your conditional logic scenarios, you set a strong foundation for smooth implementation. For more information on process mapping and improving efficiency, check out this helpful resource: Process Mapping in Continuous Improvement Efficiency.
Capture Your Processes in Minutes!
Step 3: Configuring Your Workflow Management Tools
With your conditional logic scenarios mapped out, it’s time to put theory into practice. Configuring your workflow management tools to implement conditional logic can seem daunting, but it’s actually quite manageable. This section will guide you through a step-by-step process, using popular tools like Flowster as a reference. Let’s dive into the configuration!
Step-by-Step Setup Instructions
To set up conditional logic in your workflow management tool, follow these straightforward steps:
- Access Workflow Settings: Start by logging into your workflow management tool and navigating to the workflow settings section. This is usually found under the main dashboard or project management area.
- Create or Select Your Workflow: If you’re starting from the beginning, create a new workflow. If you have an existing workflow, select it for modification.
- Add Conditional Logic Rules: Look for an option to add conditional logic. In Flowster, this typically involves selecting a specific task or step in the workflow and choosing the ‘Add Condition’ feature.
- Define Conditions: Input the criteria you established in your mapping. For instance, you can set conditions for leads, such as, “If Lead Source equals Facebook, then assign to Sales Team A.”
- Test Your Logic: Before fully implementing, test your workflow to ensure that the conditions trigger the desired outcomes. This step is crucial for ensuring your automation works effectively.
Navigation Tips and Visual Aids
As you configure your workflow management tools, having visual aids can make the process significantly easier. Here are some tips:
- Use Screenshots: Capture key steps in your setup process to create a quick reference guide. This is especially useful for team members who may be less familiar with the tools.
- Refer to Documentation: Don’t hesitate to consult the official documentation of your workflow management tool. These resources often contain walkthroughs and troubleshooting tips that can assist you in the configuration process.
- Seek Support When Needed: If you encounter challenges, reach out to customer support or check forums for solutions. Engaging with the community can provide additional insights.
By following these steps, you’ll be well on your way to effectively configuring your workflow management tools to implement conditional logic successfully. Remember, the more organized you are during this setup phase, the easier it will be to reap the benefits of automation!
For a more detailed guide, check out this helpful video on using conditional logic rules in Flowster.
Step 4: Testing and Iterating Your Workflows
After configuring your workflow management tools and setting up your conditional logic, the next step is to ensure everything functions smoothly. Testing and iterating your workflows is essential for confirming that your automation actually works as intended. This section will cover the importance of rigorous testing and how to use feedback effectively to refine your processes.
The Importance of Testing
Testing your workflows is critical for several reasons. First, it allows you to identify any issues in your conditional logic before it affects your team or operations. By proactively addressing potential problems, you can ensure a smoother workflow.
Start with a small-scale test, using real-world scenarios to see how your conditional logic performs. Check that all conditions trigger the appropriate actions and that there are no unintended consequences. This step helps to validate your setup, providing confidence in your automation.
Gathering Feedback and Making Adjustments
Once you’ve conducted your tests, seek feedback from your team. Their insights will be invaluable in understanding how well the conditional logic works in practice. Here are a few strategies for gathering feedback:
- Create a Feedback Loop: Encourage team members to share their experiences with the new workflows and report any issues or suggestions for improvement.
- Analyze Performance Data: Use analytics tools within your workflow management software to track performance metrics. This data can illuminate patterns and areas needing adjustment.
- Iterate Based on Input: Be open to making changes based on feedback and performance analysis. Continuous improvement is key to maximizing the effectiveness of your workflows.
By rigorously testing and iterating your workflows, you ensure that your effort to implement conditional logic yields the best possible results. This process not only enhances efficiency but also fosters a culture of improvement within your team.
For more tips on involving your team in process documentation and improvement, check out this helpful article: Process Documentation: Effectively Involve Your Team.
Flowster's AI-Driven Automation
Step 5: Training Your Team
With your conditional logic successfully implemented and your workflows refined, it’s time to focus on your most valuable asset: your team. Proper training is crucial to ensure everyone understands how to utilize the new processes effectively. In this section, we’ll explore strategies for training your team and providing ongoing support as they adapt to utilizing conditional logic in their daily tasks.
Educational Strategies
To ensure your team is comfortable with the newly implemented workflows, consider these educational strategies:
- Interactive Workshops: Host hands-on training sessions where team members can practice using the workflow management tools. This interactive approach helps reinforce learning and allows for immediate questions and clarifications.
- Create Training Materials: Develop easy-to-follow guides or video tutorials that outline how to navigate the new workflows and apply conditional logic. Visual aids can often make understanding complex processes much simpler.
- Encourage Peer Learning: Foster a culture of collaboration by pairing experienced users with those who may need more support. Peer learning can enhance confidence and promote a smoother transition.
Resources for Ongoing Support
Training doesn’t stop after the initial rollout. To support your team over the long term, provide access to ongoing resources:
- Documentation and FAQs: Maintain a centralized repository of documentation that includes FAQs, best practices, and troubleshooting tips. This resource can serve as a quick reference for team members as they adjust to the new systems.
- Regular Check-Ins: Schedule periodic check-ins to address any challenges your team might be facing. These meetings can provide an opportunity for open dialogue and continuous improvement of the implemented workflows.
- Continued Learning Opportunities: Encourage team members to explore further training resources, such as webinars, online courses, or certification programs focused on workflow management and automation.
By investing in training and ongoing support, you empower your team to fully embrace the changes that come with implementing conditional logic. This will not only enhance their skills but also contribute to a more efficient and effective workflow environment.
For additional strategies on implementing processes and procedures effectively, look at this insightful article: Processes and Procedures Implementation Strategies.

Conclusion
In today’s fast-paced work environment, finding ways to streamline processes is crucial for maximizing productivity. By learning how to implement conditional logic in your workflow management tools, you can automate decision-making, reduce manual errors, and free up your team to focus on higher-level tasks.
Throughout this article, we’ve covered the essential steps—from identifying suitable processes to mapping out scenarios, configuring tools, testing workflows, and training your team. Each step is designed to ensure that your transition to using conditional logic is as seamless and effective as possible.
Now that you’re equipped with the knowledge and strategies needed, it’s time to take action. If you’re ready to get started, you can easily access free templates to help you on your journey at Flowster Marketplace. Happy automating!


