Here at Flowster, one of our main goals is to provide a tool that helps our members complete work in ½ the time. So we love to focus on making improvements that make it easier for people to manage their tasks and make sure everyone on their team is working as efficiently as possible.
This mindset helped guide us in creating the new Flowster task calendar. Let’s take a look at its various features and how you can best use it to make your business and team as productive as possible.
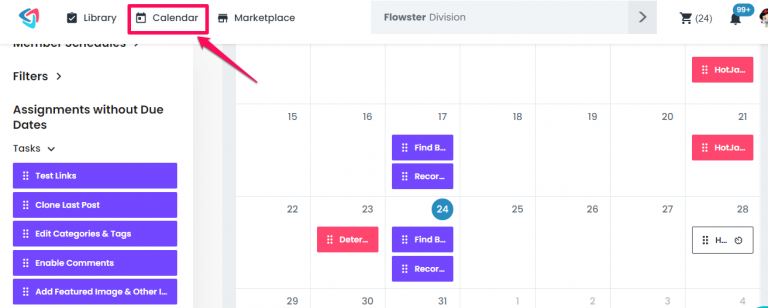
To access the calendar click the “Calendar” tab:
See Your Assigned Tasks
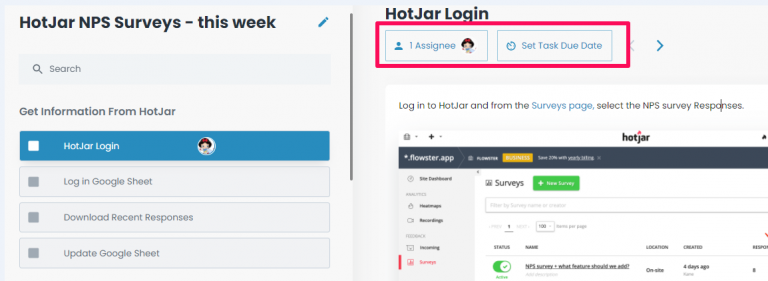
The Flowster calendar makes it easy to see all your active, assigned tasks. This means that if you’re assigned to a specific task within a workflow, and the task has a due date set, like this:
You’ll see it in the calendar:

See Your Assigned Workflows
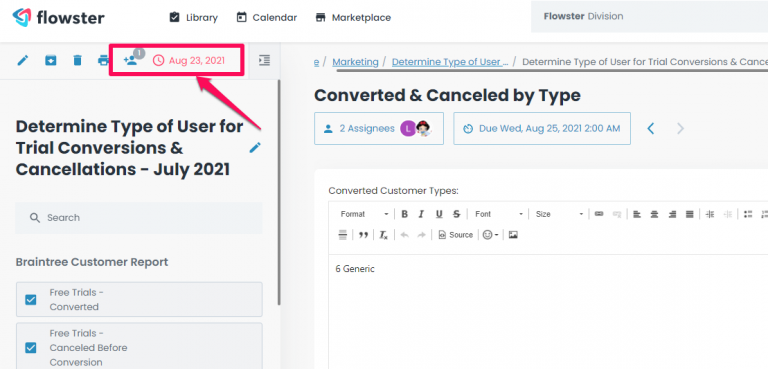
Similarly, if you’re assigned to an entire workflow, that has a due date set, like this:
You’ll see it in the calendar, like this:
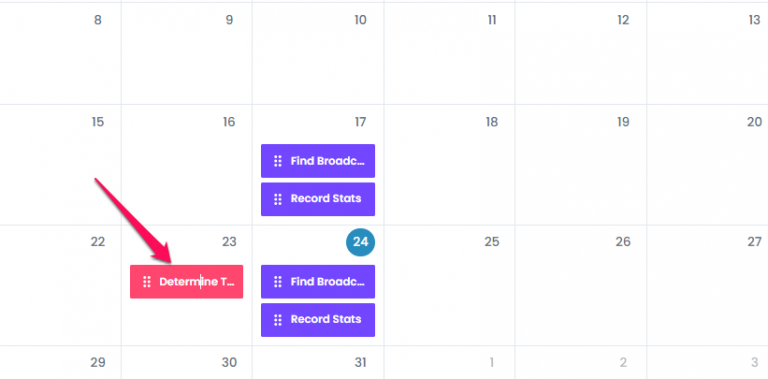
Notice that the icons in the left side of the cards are different:
represents an entire workflow
represents a single task
See Your Future Assignments
If you have Scheduled Workflows, like this:

Then, you’d click the Schedule Workflow menu item:

This would pop open the Workflow Schedule dialog, and you’d set it up like so:
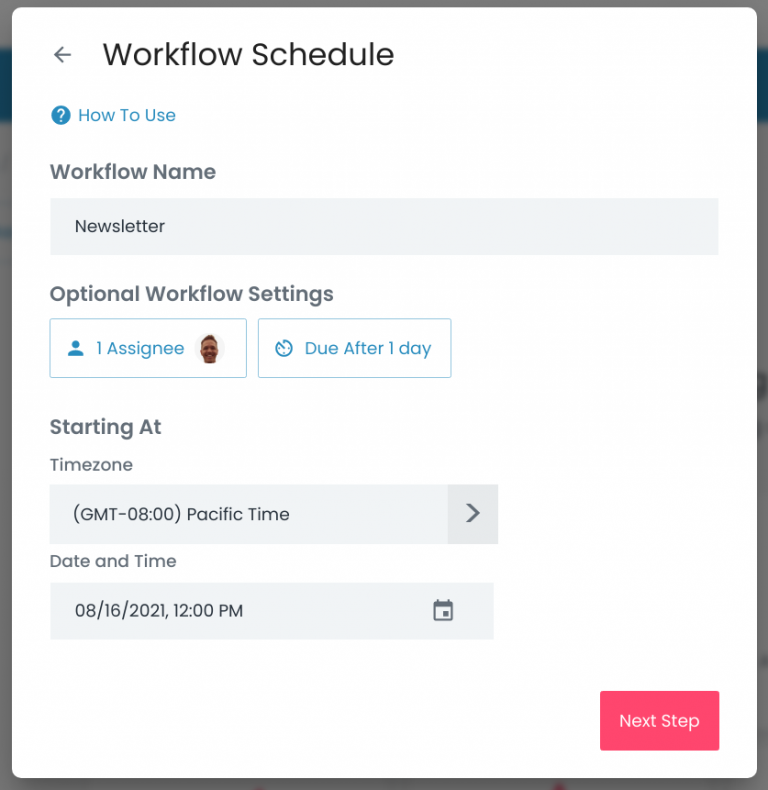
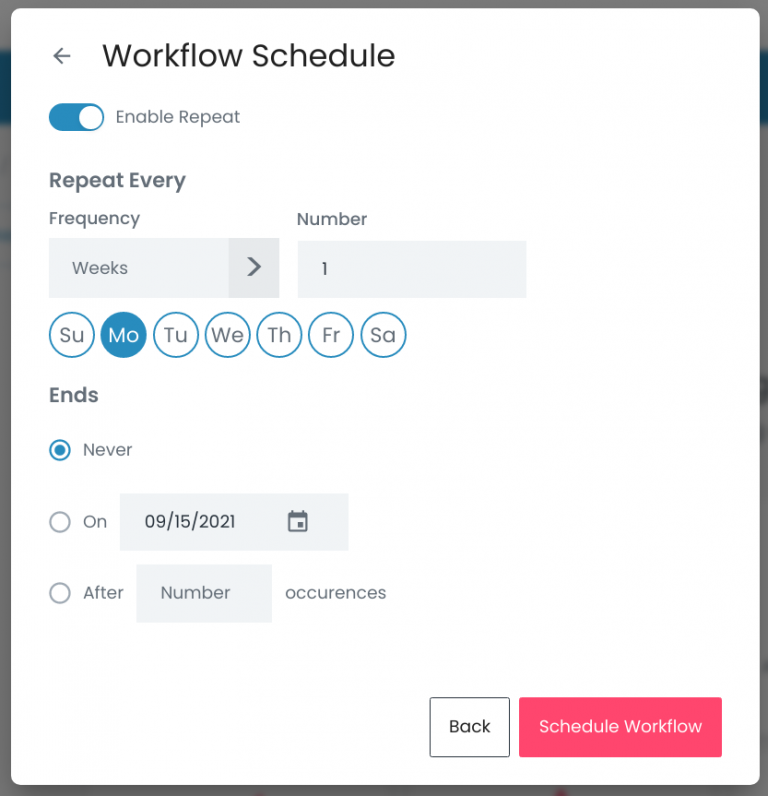
They’ll also appear in the calendar:
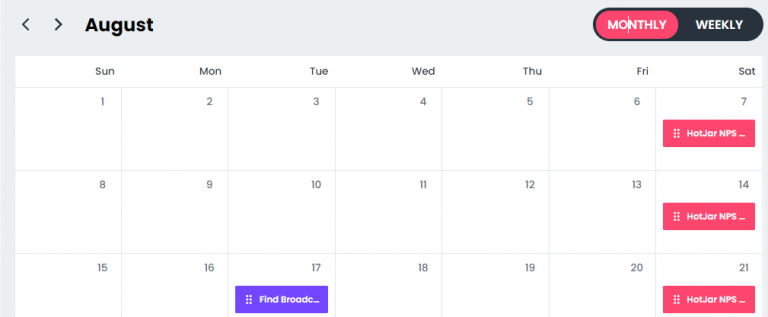
Note that the pink card is a workflow that’s already been created by this schedule, and the grey cards are recurring entries that happen in the future.
View by Month, Week, Day, or List
The default view is an entire month, however in the top right you’ll see these buttons:

You can use these to see a week:

Change The Due Dates/Times
You can drag-and-drop cards in the calendar to change their due dates and times.
Here’s an example from the month view. You’ve decided that a Workflow that was due on the 18th should be due earlier, on the 16th:
When this happens, the due date of the workflow is changed, however its due time remains the same.
When you’re in week view or day view, you can also change the due times of assignments by dragging-and-dropping them within the calendar.
View Other Members Assignments
By default, when you load the calendar, it will display data for yourself:

However, if you click your name in the top left, you can select another user in your active division (note that Guests can only view their own calendars):

This is useful for managers to keep track of what their team is working on, and easily adjust due dates.
Unassigned
If you select “Unassigned” from the list of users, you’ll see all the assignments that have due dates set, but nobody assigned to them. This is helpful so that things don’t fall through the cracks … you can then make sure every task or workflow has someone working on it.
Assignments without Due Dates

Note:
- The blue cards represent a single task
- The pink cards represent an entire workflow
If you drag these cards onto the calendar, either in month, week, or day view, wherever you drop them will set their due date/time. It’s generally a good idea to have a due date set, because if not, these assignments could be ignored as there’s no urgency to complete them.
Pro Tips
Recurring Entries
This button allows you to hide or show any calendar entries that are recurring:
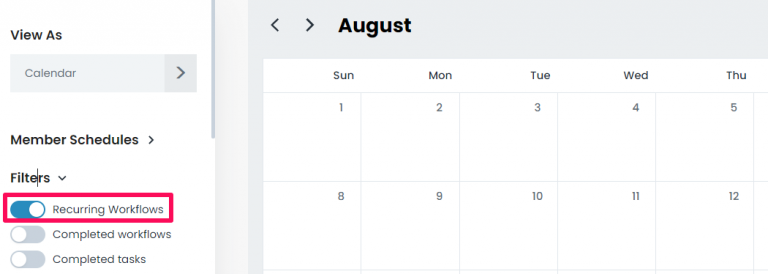
Specifically, a recurring entry would be from a Workflow Schedule that has repeat options defined, like this:

Then, you’d click the Schedule Workflow menu item:

This would pop open the Workflow Schedule dialog, and you’d set it up like so:


Completed Entries
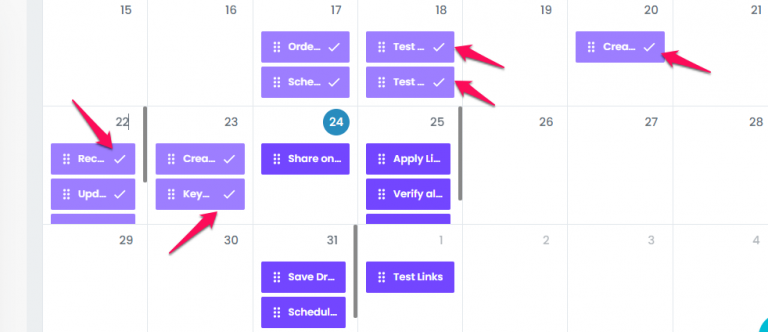
This button allows you to show or hide any completed tasks or workflows. In this example below, if you click it, these green cards will disappear, since they’re completed:
Next Steps
Now that you know what the calendar can do, and how to use it, you should head over to the calendar page and start playing around with it.
Got any feedback? Would you like to see a new feature added, or an existing feature improved upon? Please let us know!

