Table of Contents
Guide to Setting up Flowster
Our goal here is to get you up and creating “Standard Operating Procedures” (hereafter called SOPs) in as little time as possible – while still learning the most important things about the Flowster application. Creating your first SOP can be done in as little as 10 or 15 minutes.
Terminology you need to understand
Within Flowster, there are a few key terms that you will want to understand.
A Template is the SOP that you create one time for a task that is likely to be repeated over and over.
A Workflow is the name we use to describe when you want to use a template, and assign it to yourself or a member of your team, so actual work gets done.
For example, if you are issuing a purchase order, you would create a Template to cover the specific steps your company does whenever it issues a purchase order.
Then, each time a new purchase order needs to be issued, you’d simply select the “Purchase Order” Template and then click the + New Workflow button to create a Workflow that you then give a due date and assign to any member of your team (or yourself if you don’t yet have a team). The responsible party will then create and issue that particular purchase order in the exact way you defined it when you created the Template in the first place.
A division in Flowster can represent your entire company, a department, a team, or even a project.
Each division will have its own members, SOP templates, and workflows. You can be a member of multiple divisions.
You’ll notice the name of your current division in a gray box near the top right of your screen. Click anywhere in this gray area to see all your divisions, and to switch divisions.
Creating your first SOP
When you first log into Flowster, the main Library page will be blank – unless you already purchased one of our collections of pre-made templates.
Assuming you haven’t purchased any pre-made Templates, your main Library page will look like this:
Notice there is a drop down menu at the top where you can select New Template, New Workflow, or New Folder.
Marketplace
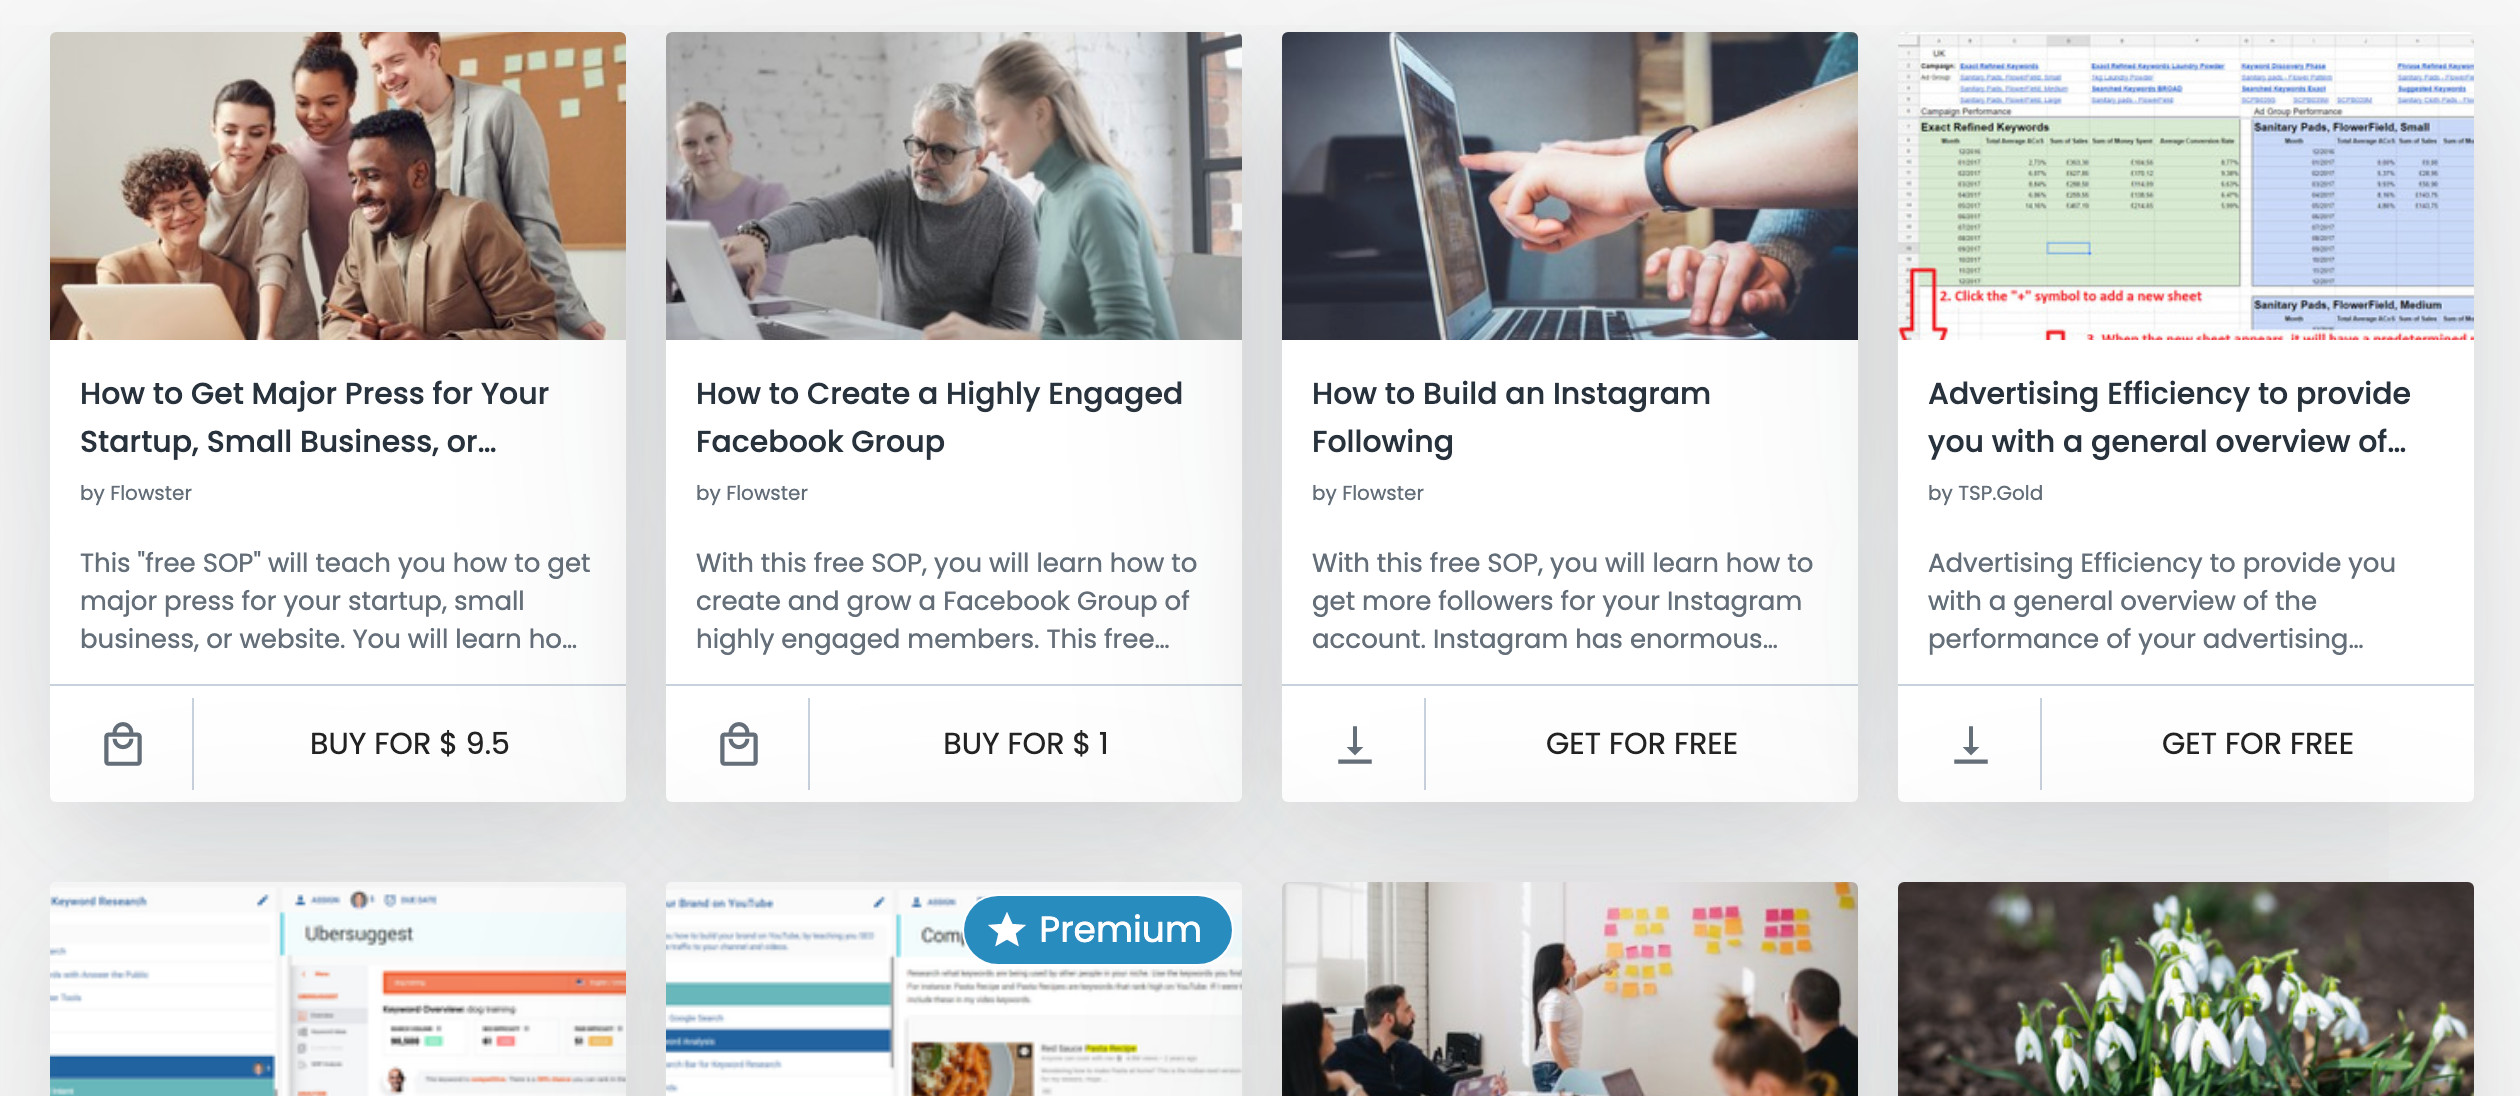
The Marketplace icon on the top menu bar will open up the Marketplace and display all the free SOP templates that you can add to your cart and import into your account quickly:
You may want to do this first so you can see some examples of how a SOP template is typically designed.
Folders
If you prefer to keep things more organized, we recommend you start creating folders first and then fill them with Templates as you create them.
In most organizations, you could have Folders for things like Marketing, Sales, Inventory Management, Client Onboarding, etc…
You can have as many as you like and call them whatever you want. The only purpose folders serve is to help you keep your Templates organized.
Templates
Now that you’ve created a few Folders, it’s time to get started creating your first Standard Operating Procedure, which we call a Template.
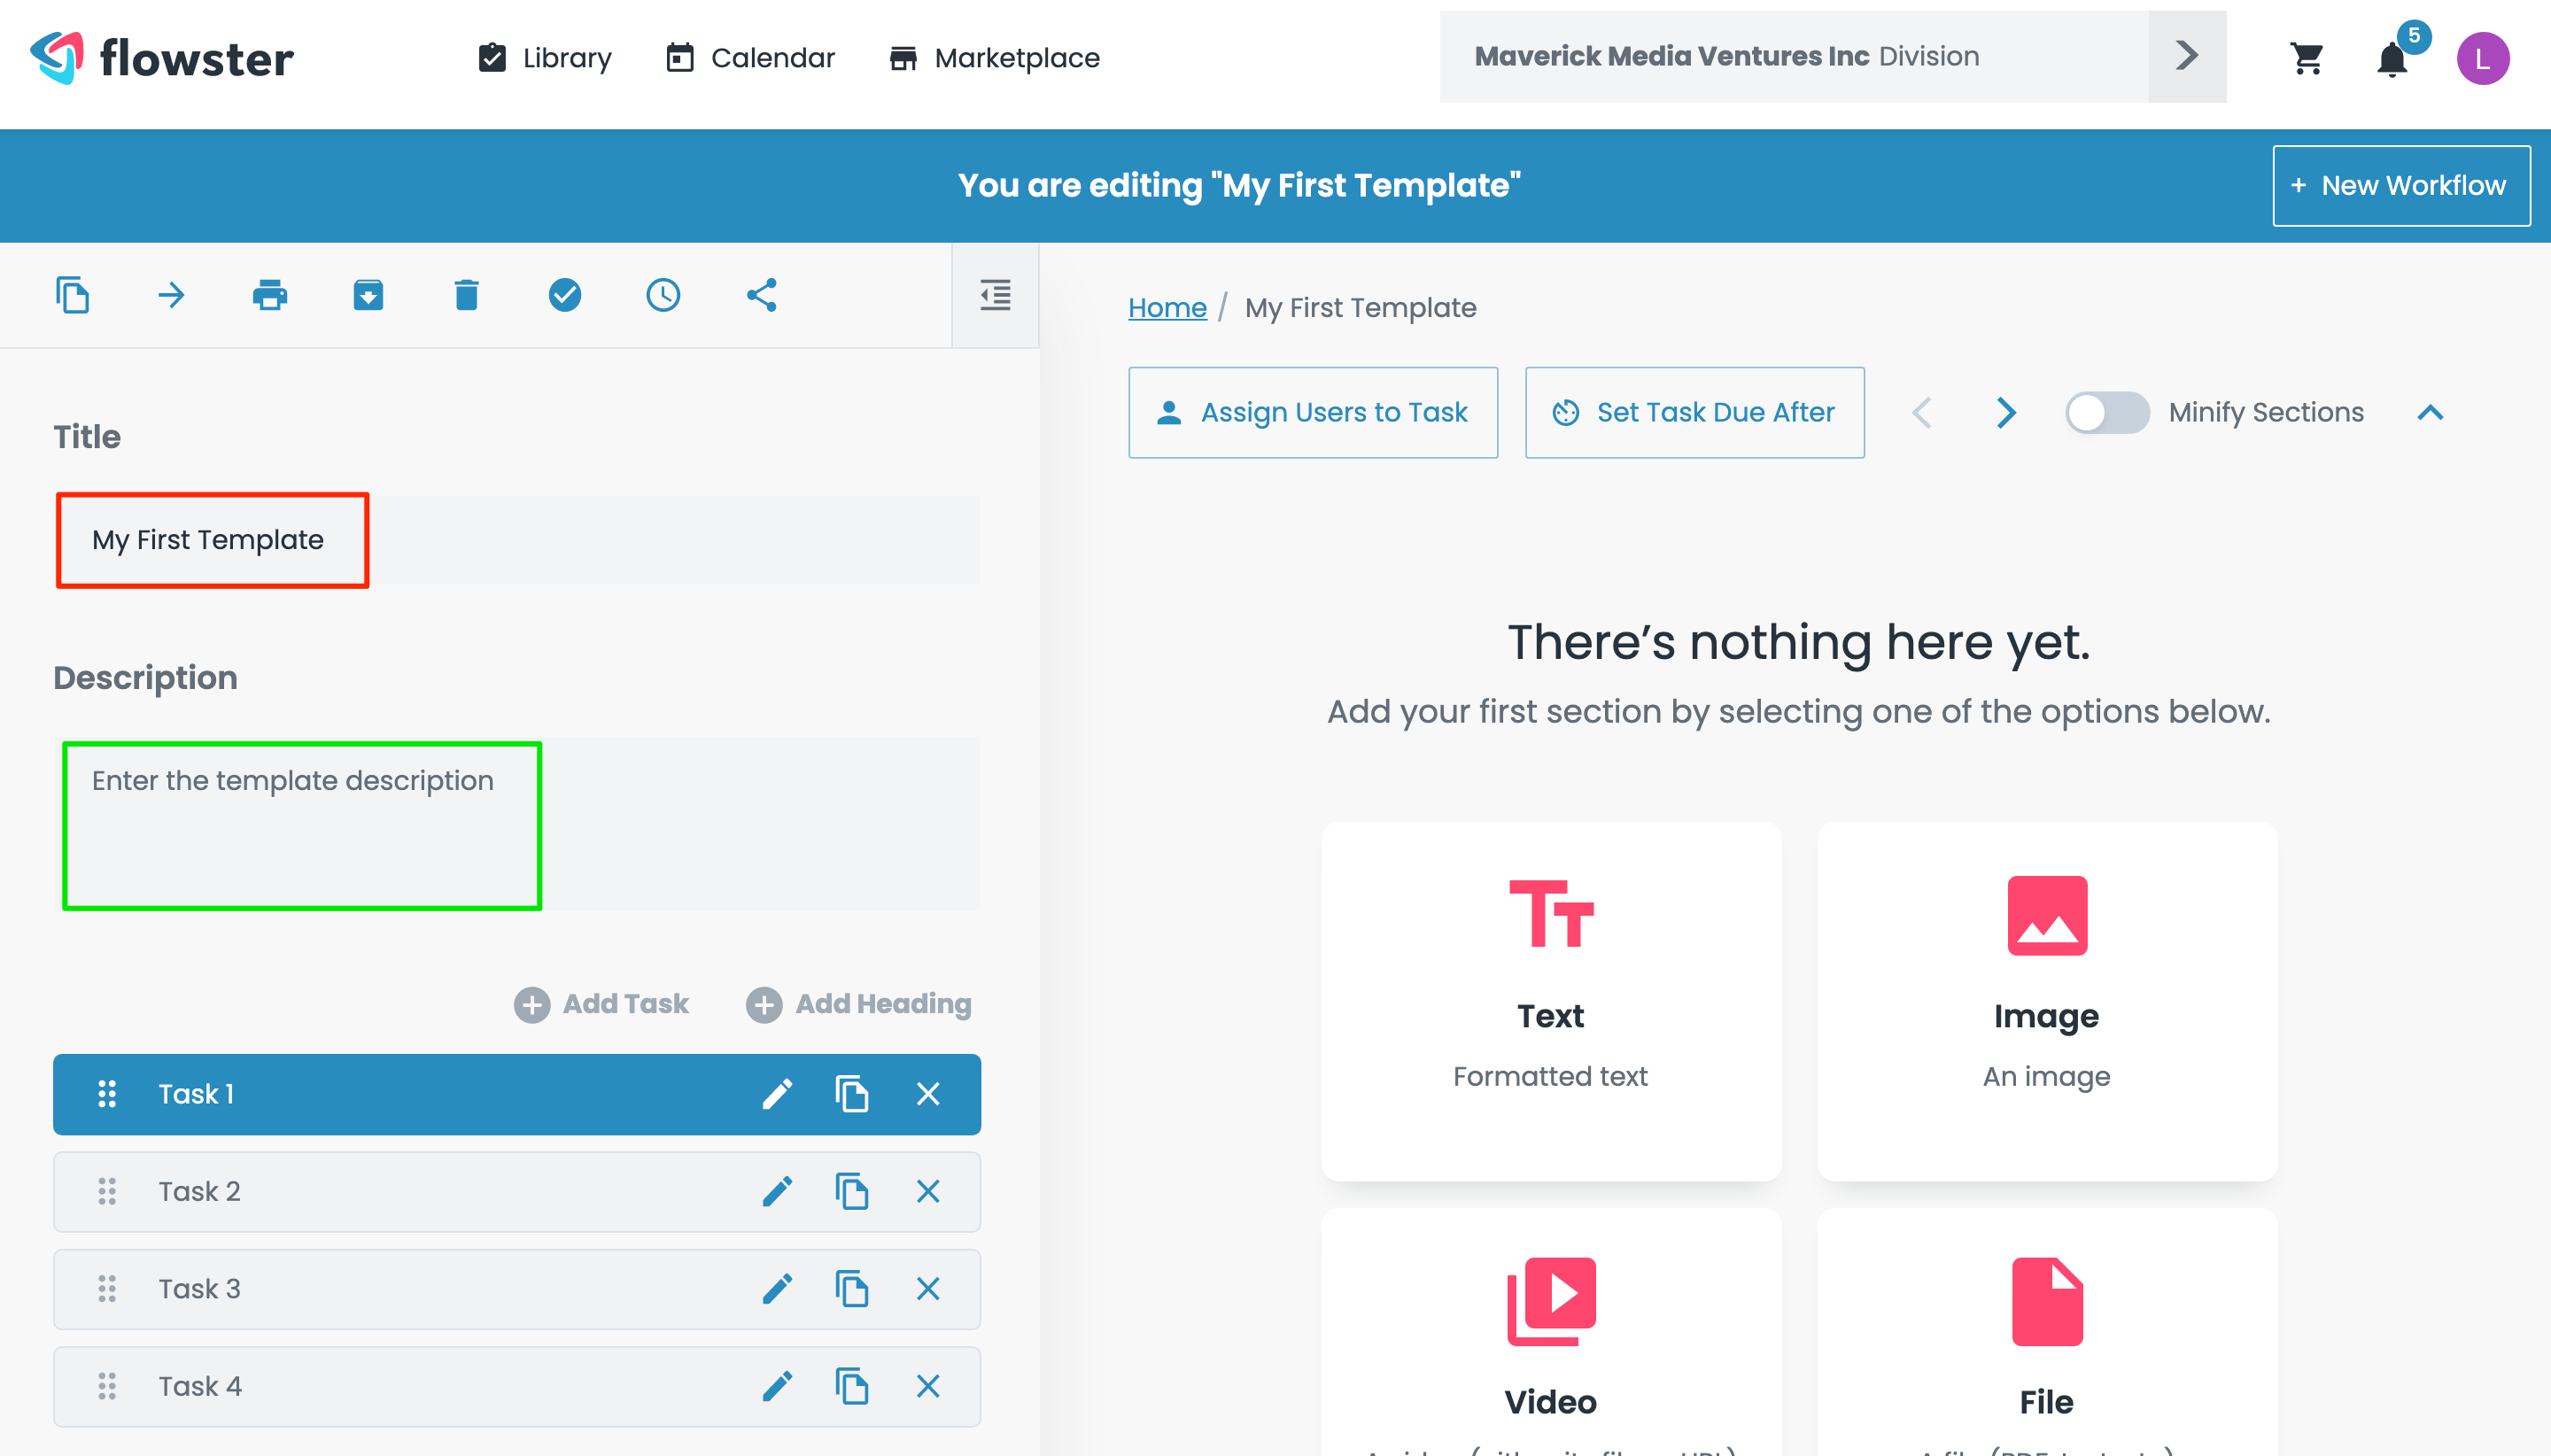
The first thing you’ll need to do is give the Template a name. You can call it anything you want and you can change the name anytime you like. I suggest you give it a descriptive name. As you can see in the image below, I named mine “My First Template” (shown in RED). In reality, you are going to want to choose a much more descriptive name like Onboard a New Client or Issue a Purchase Order or Onboard a New Employee, etc…
I also strongly recommend that you take a moment to write a description. This is where you will use a few sentences to describe when this Template should be used, what it is for, and the type of person that it would most likely be assigned to. (Shown in GREEN).
Once you’ve given your SOP Template a name and a description, it’s time to start adding the step-by-step instructions. To create these instructions, you are going to use Tasks. Within each Task, there will be one or more Sections.
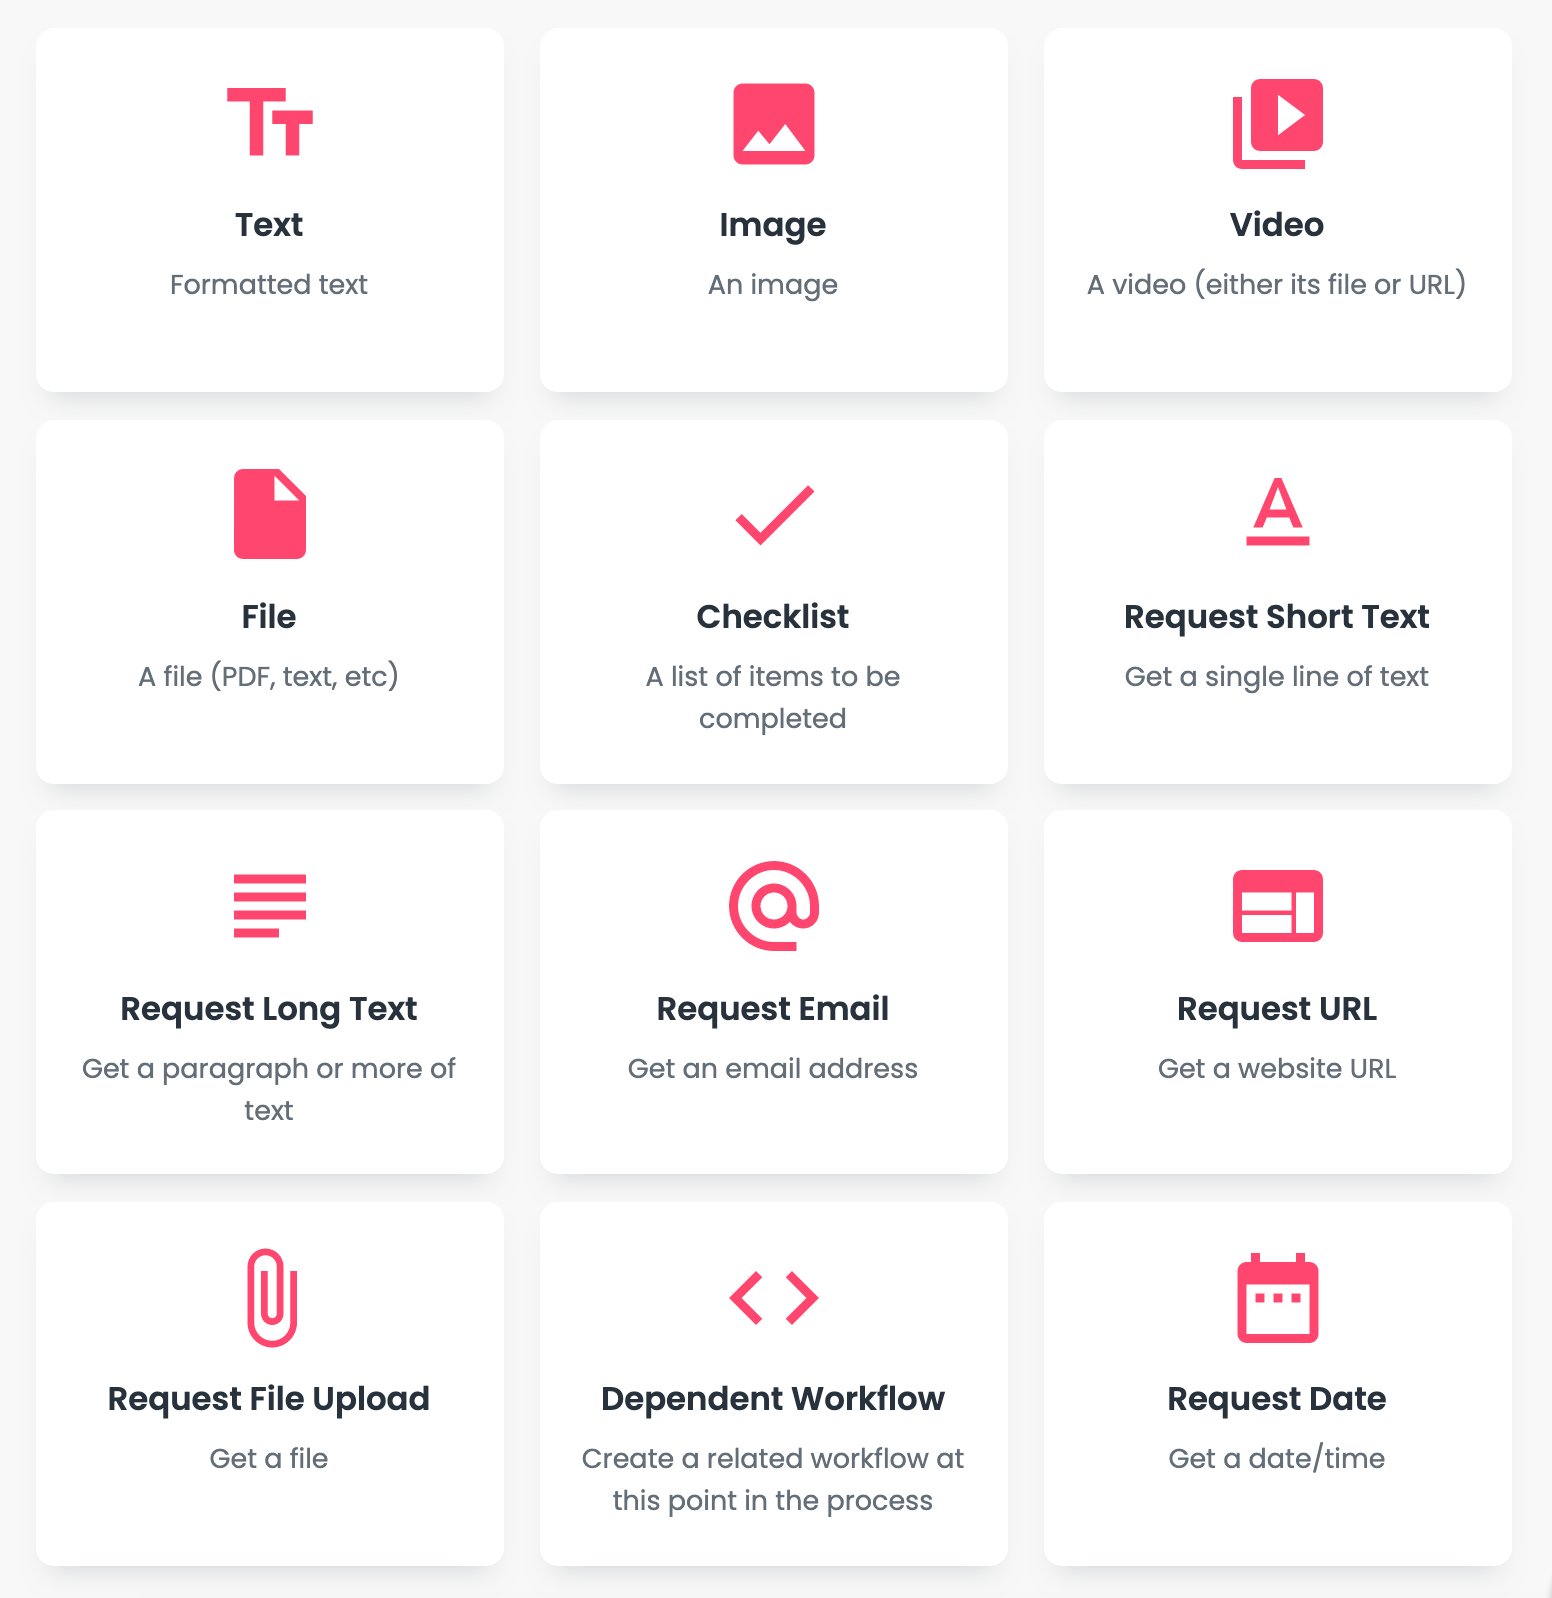
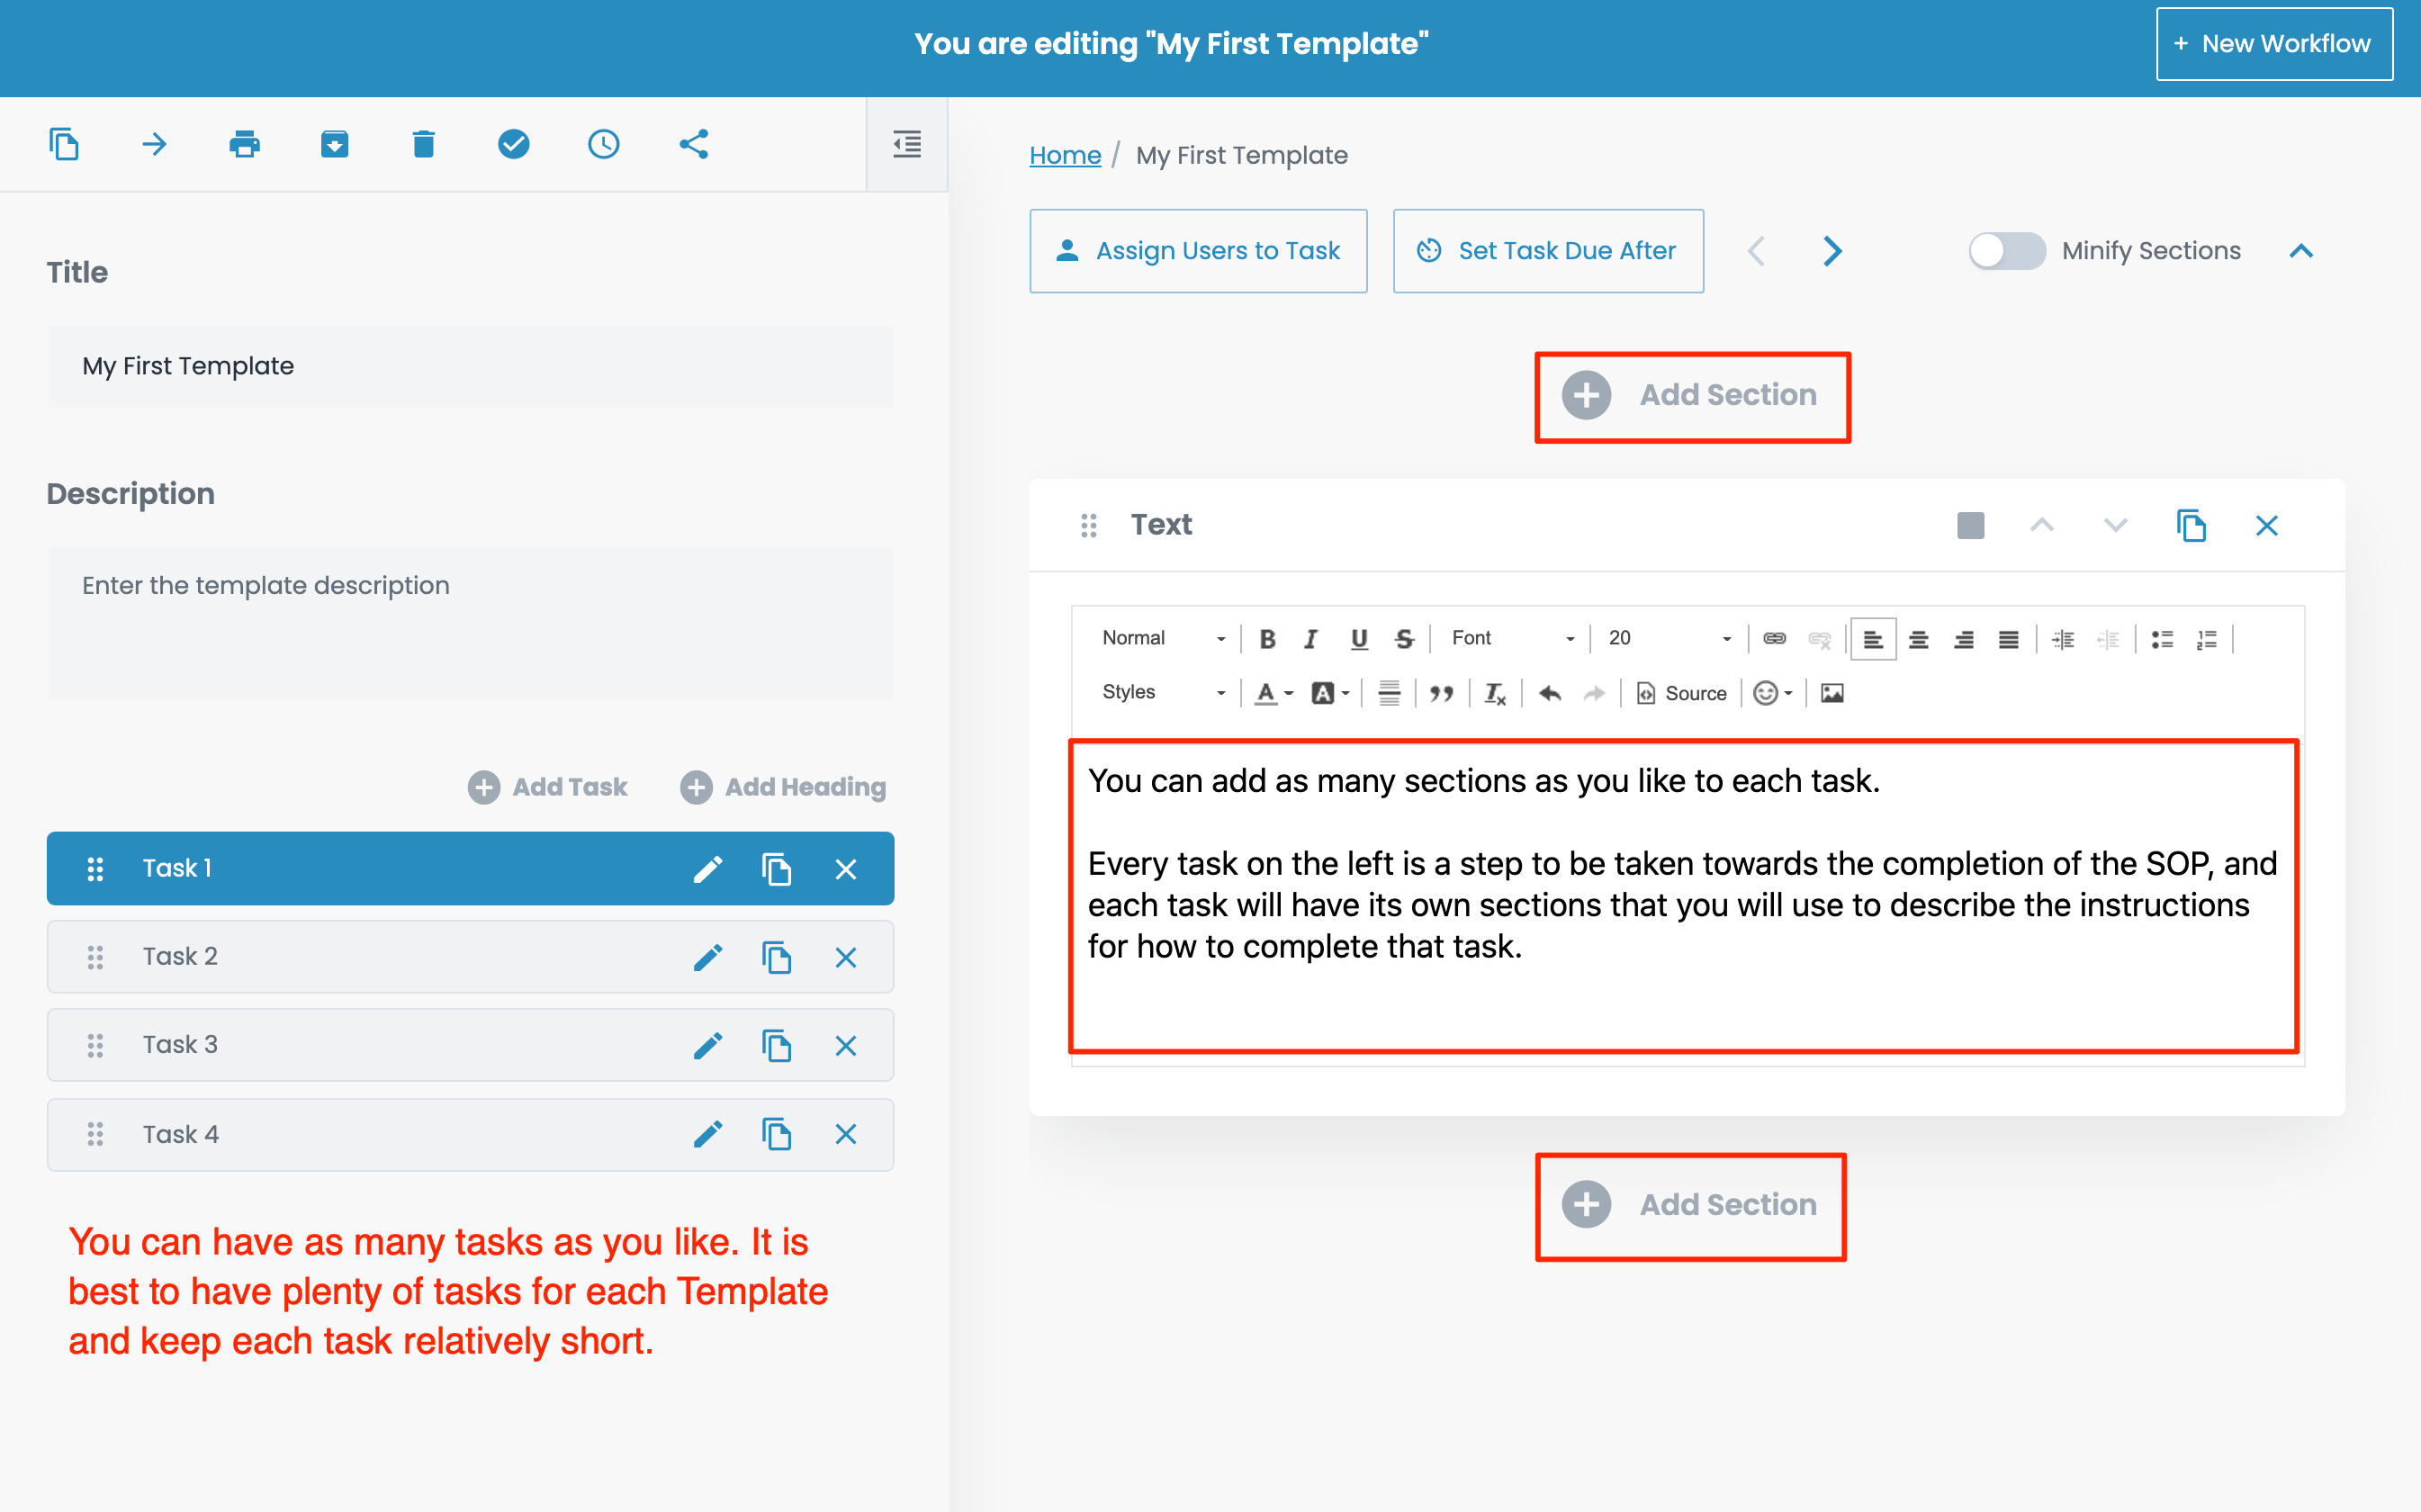
As you can see in the screenshot below, you will be prompted to add a Section when you are editing a task that does not yet have any Sections. Once you have added your first section, Add Section buttons will appear.
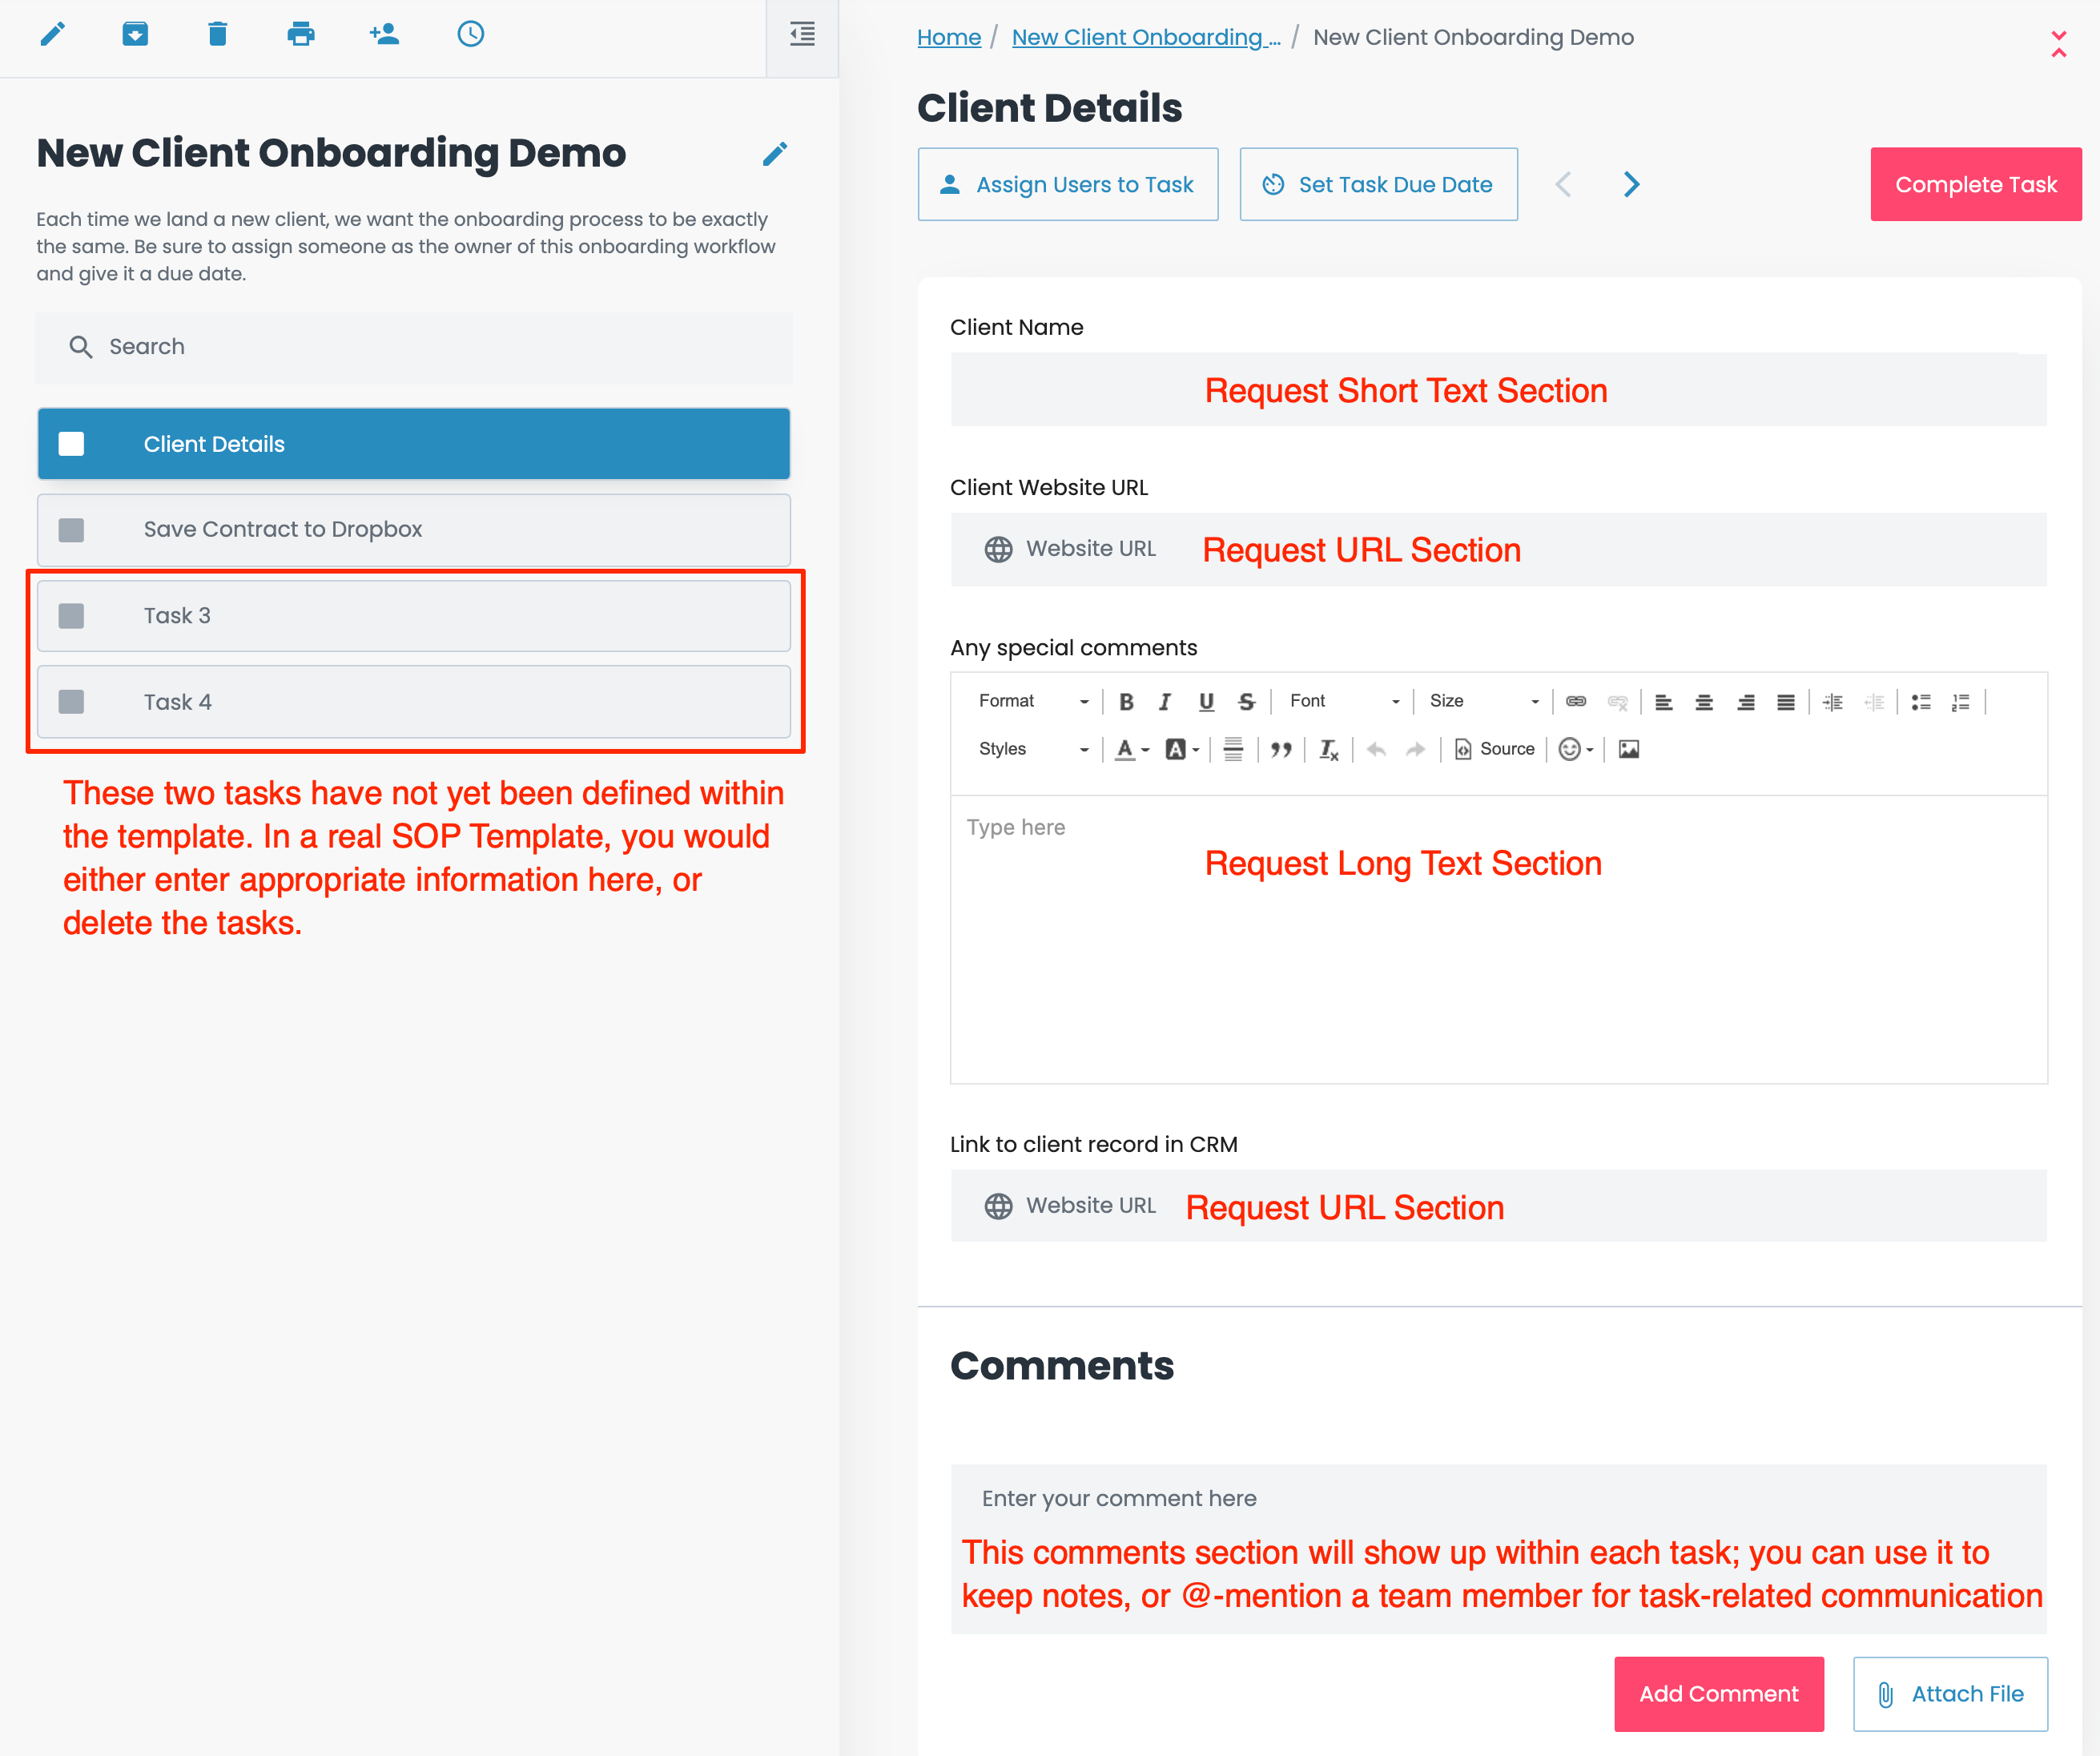
You may have noticed that 6 of the section types contain the word Request in their name. That’s because you would use these when you want the person doing the work to input some type of data into the Workflow as they are completing it.
In the image below is a screenshot of the Workflow of our demo SOP Template. As you can see below, in the first task (Client Details), when we designed the SOP Template, we made use of several input sections so that when a Workflow was run and assigned to a team member, they could input the required information.
Assigning Workflows
Once you have your first SOP Template completed, you are ready to use it to create your first Workflow so you can actually begin to delegate some of your work to other people!
Congratulations! You’ve just taken your first step to working ON your business instead of IN it – and life will never be the same again, I can assure you.
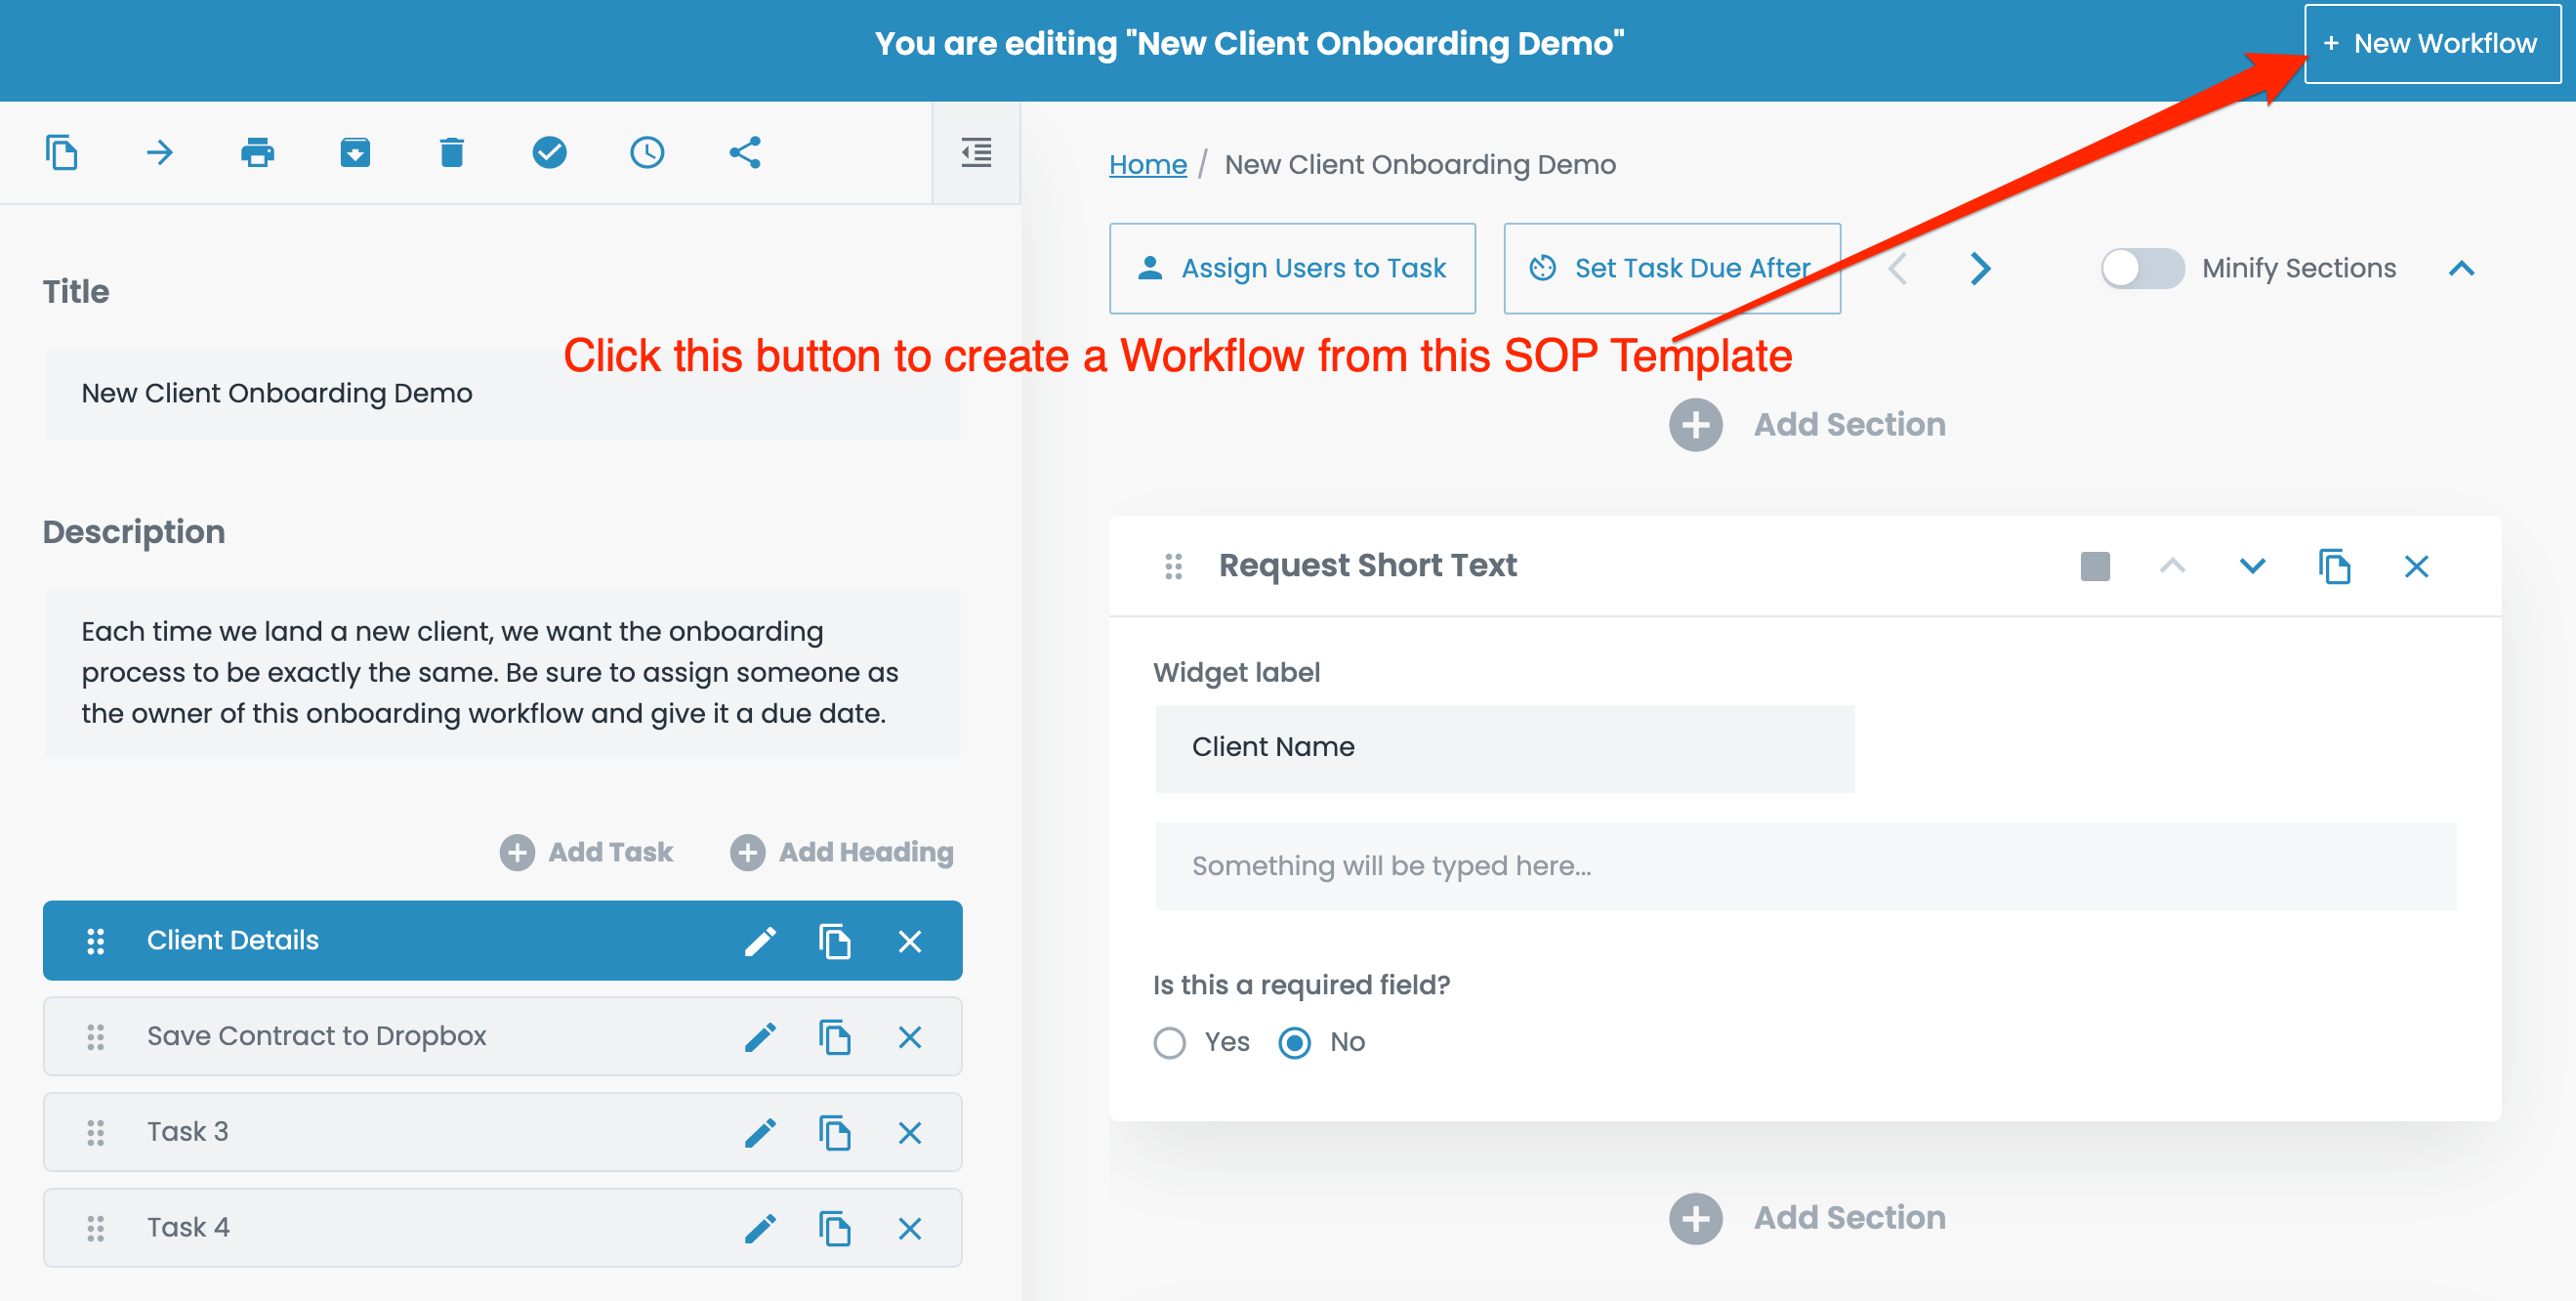
To create a Workflow from a SOP Template, all you need to do is click the + New Workflow button.
Once that button is clicked, you will be asked to give the Workflow a name, and once you do that, you’ll be taken to the Workflow itself.
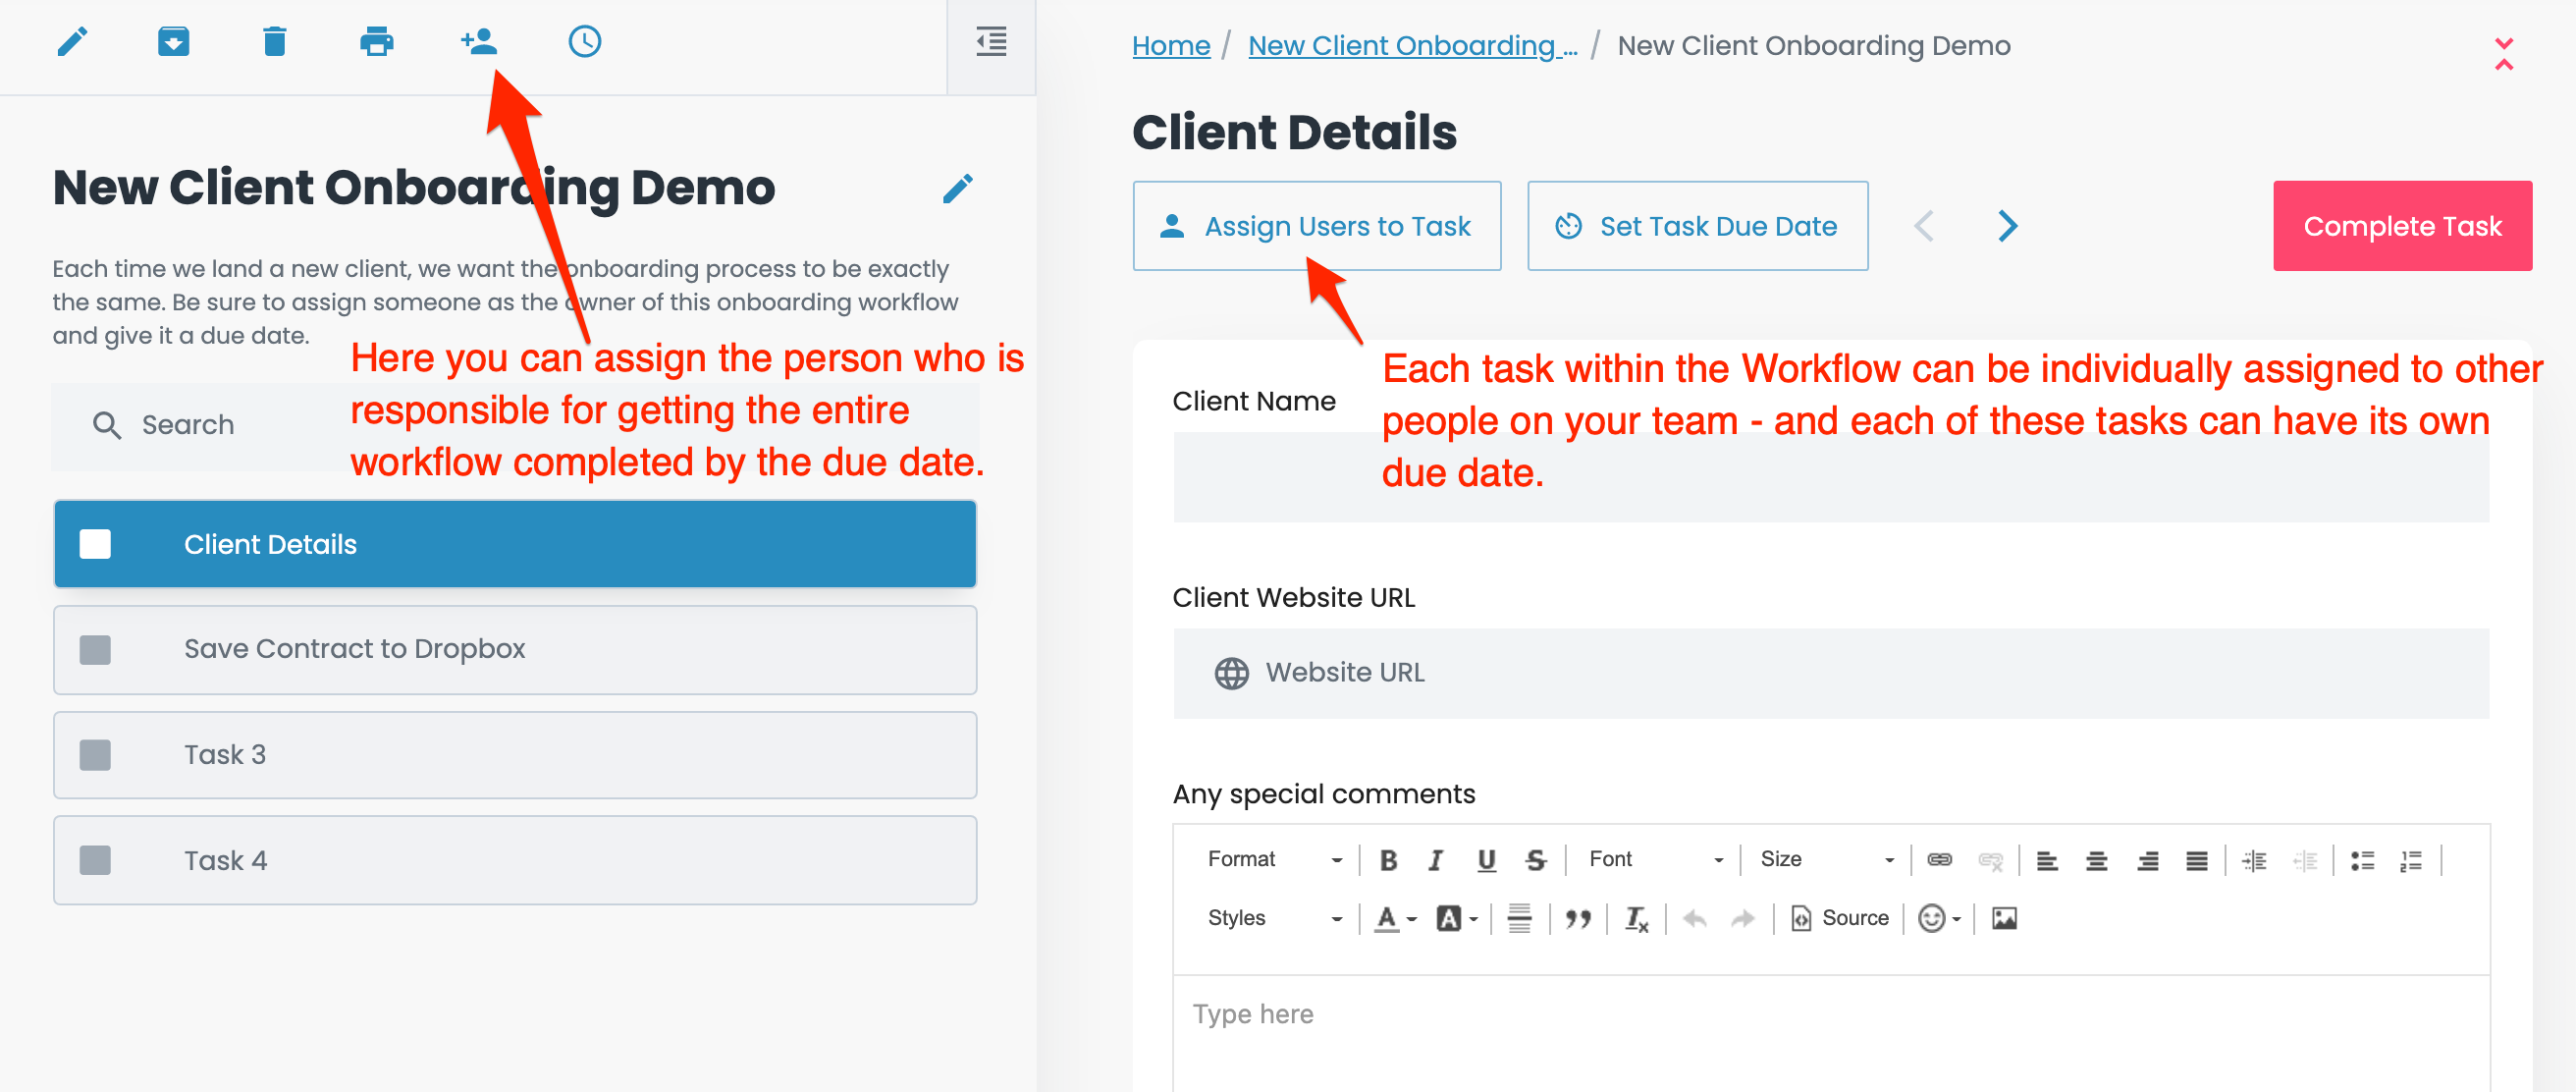
At this point, it’s a very good idea to select the person on your team who’s going to be responsible for ensuring the workflow is completed by the due date (you can assign it to multiple people too, if you like).
Once you’ve assigned the person who’s in charge of the entire Workflow, you or that person (as long as they are a Member and not a Guest) can assign individual Tasks to other people on your team – and each of these Tasks can have its own separate due date.
So, in reality, if you have a large SOP Template that is made up of 10 or 20 Tasks, you can easily delegate each of the Tasks to other people on your team with as many different due dates as you like. Better yet, if the same people will always be responsible for completing the same tasks, you can assign those tasks to them from the Template level, and each time a Workflow is run, they will automatically have that task assigned to them.
For each person who is assigned a Workflow or a Task on a Workflow, they’ll receive an email and in-app notification letting them know that they have work to complete, and by when it needs to be completed.
Voila – now you have project management capabilities right within Flowster!
Administering Your Account
We created Flowster to serve the needs of organizations that are staffed by as little as one person, all the way up to hundreds or even thousands of people. There are three types of user accounts:
- Admins
- Members
- Guests
Admins are the folks that can create and delete other users, assign roles, and even create new Divisions. (You would only need multiple Divisions if you are running multiple, separate businesses). They can also do everything that Members can do.
Members are the folks that can create, edit, and delete Templates. They’re also the ones that can create a Workflow from a Template, give it a due date, and assign it to anyone else on the team.
To get your work done, you can have as many Guest accounts as you need. Guest accounts are free and the only thing that a Guest user can do is take an assigned Workflow and complete it. In our organizations, all of our virtual assistants (VA’s) use Guest accounts.
That’s all you need to know to use Flowster
I sure hope you’ve found this introductory guide helpful!
If you would like more information on any of the topics covered here, feel free to contact us.
Now, about those “best practices” for SOP Template creation …
If you’re committed to transitioning from working IN your business to working ON your business, a big part of making that happen is to create an SOP Template for literally every repetitive process that exists in your company.
While this may sound like a lot of work, the good news is that you don’t have to create them all today! Instead, I recommend that the next time you are about to do something that gets done repeatedly in your company, you take some extra time and document the process in Flowster as you are actually doing the process!
That way, you will easily be able to delegate that process to someone else on your team next time.
To help you with that, here’s a terrific article on some best practices for creating SOP Templates Within Flowster.

